Chicken Tarriwala/ Homestyle Chicken Gravy
As a kid, these aromas used to waft through my home, my grandparent's homes, even in the fellow punjabi neighbour's homes. If you go to north India, Chicken when made at home is made in a gravy that is relatively water-y than the chicken gravies you get at restaurants. It serves 2 purposes- firstly, it adds volume to feed large families, secondly and most importantly, the phulka or roti is dunked in the bowlful of delicious chicken gravy, submerged till your thumb n fingers are coated in the gravy and then eaten. For some, the idea of having a curry coat one's fingers might not be so appealing, but you have to do it to understand the beauty in licking off the sheer goodness of those magical Indian flavours that not only coat your fingers but the lingering impact they leave on your soul, hours after you have eaten them.
The ingredients I am using in this recipe are not new, neither is the combination but its the heart of the dish that makes it ever so divine. Juicy, tender pieces of chicken that literally fall off the bone while the curry simmers gloriously and that sweet torture that never seems to end. By the time this curry finishes cooking in our house, everyone has their stomach's rumbling and their plates ready to be served. We also, very frequently use it over rice too ofcourse. When we were around 4-5 years old, my brother n I, my mom used to make rotis, tear them into small bite sized pieces, take a soup bowl filled with this chicken curry, add in all those roti pieces to it and then feed them to us. Ahh.... the real small treasured memories of my life.
Onto the recipe then. Also, if you are intending to make the Tarriwala Chicken, make sure you have 2-3 hours cooking time and that you have all your masalas mis-en-place so you don't forget anything out. Lets enter the enchanted land of Punjabi cooking then, shall we?!
Complexity: ***
Time taken: 3 hours
Serves: 6
You'll need
1 kg Chicken (I used 4 drumsticks and 5 thighs)
5 medium onions (minced, about 2 cups)
5-6 tomatoes (1 can puree)
7-8 garlic cloves
1 thumb sized ginger piece
4-5 tbsp oil (flavourless)
1 tbsp ghee (clarified butter)
1 tbsp cumin
3 green cardamoms
2 black cardamoms
1 1/2" cinnamon stick
2-3 bay leaves
2 green chilies (split lengthwise, optional)
salt to taste
1 tbsp red chili powder
1/2 tbsp turmeric powder
1 1/2 tbsp coriander powder
some coriander leaves
4-5 cups of water
pinch of love
Method
Firstly I minced my onions, garlic and ginger in a food processor. Yes I have no knife skills. No, I'm not ashamed of it and neither should you be!

Here how you want them to look. All minced. If there a few larger pieces here and there, its okay.

In a large pot, have your oil heating on medium flame.

When the oil is hot, add ghee to it.

In a minute or so when ghee has completely melted, add in the cumin seeds to it. The cumin will start to temper almost immediately.

Start adding in the rest of your whole spices. So in go the bay leaves, the cinnamon, the black and green cardamoms. Saute these for a couple of minutes till they start to release their flavour on a medium low heat.

Now add in the minced onions, ginger and garlic to the pot.

Give it a stir.If you are adding green chilies, now is the time.

Add in a pinch of salt to help the onions release the moisture.

Spread this mix nice and even in the pot, and we want these onions to slowly caramelize to release their sweetness. Keep stirring about every 5-7 mins. Also make sure you keep an eye on the heat because we don't want the garlic to burn. Burnt garlic=no good.
This is after 20 mins of sauteing. The aroma emanating from this is insanely good! If you have made an Indian curry before you'll know what I'm talking about.

Keep going. This is after a total of 40 mins of slowly caramelizing the onions. The taste of this is sweet, earthy, spicy all at the same time. The pungency of the ginger and garlic will have cooked out by now. The whole spices will have roasted so beautifully. the oil will now float to the top and the sides of the onions. the green chilies have almost disintegrated by this time.

Now is the time you add your quartered tomatoes to the same food processor (yes I know there are bits of onions and garlic in the jar) and make a puree of it.

Pour in the puree to the pot onto the bed of those caramelized onions. Add in your pinch of love too while you're at it.

To season all the elements in the dish, add in a pinch of salt again to the pot. (also notice the special arrangement of the bayleaf so you can see I have added the salt- I know, I suffer from bloggeritis)

Increase the heat to a medium, and cover the pot partially because the tomato puree splutters when it cooks. Also known as Peek-a-boo with tomato gravy!

After about 10 mins of cooking like this, the moisture in the tomatoes will have reduced. So we add the dry spices. In goes the turmeric

The red chili powder

The salt, be careful, we have already added some before

The dry coriander powder.

Again stir in the spices and let the curry cook for another 20 mins or so till the oil starts to show up on the sides of the pan and floating on top.

Make sure your chicken is washed thoroughly and pat it dry. I don't trim out the fat, I think it adds flavour to the entire gravy. You can do as you please. Also you can use any cut of the chicken here but I prefer some meat on the bones cause bones always add more flavour. Lay down your chicken pieces on the beautifully aromatic curry base. This curry base btw is known as Bhuna Masala or slow cooked/ roasted masala.

Add in 4-5 cups of water, enough to submerge the chicken entirely. See how my pot is almost full with water. Cover and let it simmer for 15-20 mins.

I also like adding a little bit of the coriander leaves right about now. The freshness of the coriander infuses with the simmering gravy and makes everything even better. Just trust me on this okay. Add half your coriander leaves while the gravy is still cooking.

This is how it looks after 20 mins. You can see bits of bhuna masala floating on top along with foam. Don't skim it yet. Give it another 15 mins. The foam will disappear and will transform into droplets of oil.

Like this.

See how the water has also reduced a little now. Keep going till you think you have the right consistency that you want to serve. I usually cook it for 30 minutes more till the chicken is completely cooked through and even the meat is almost starting to fall off the bone.

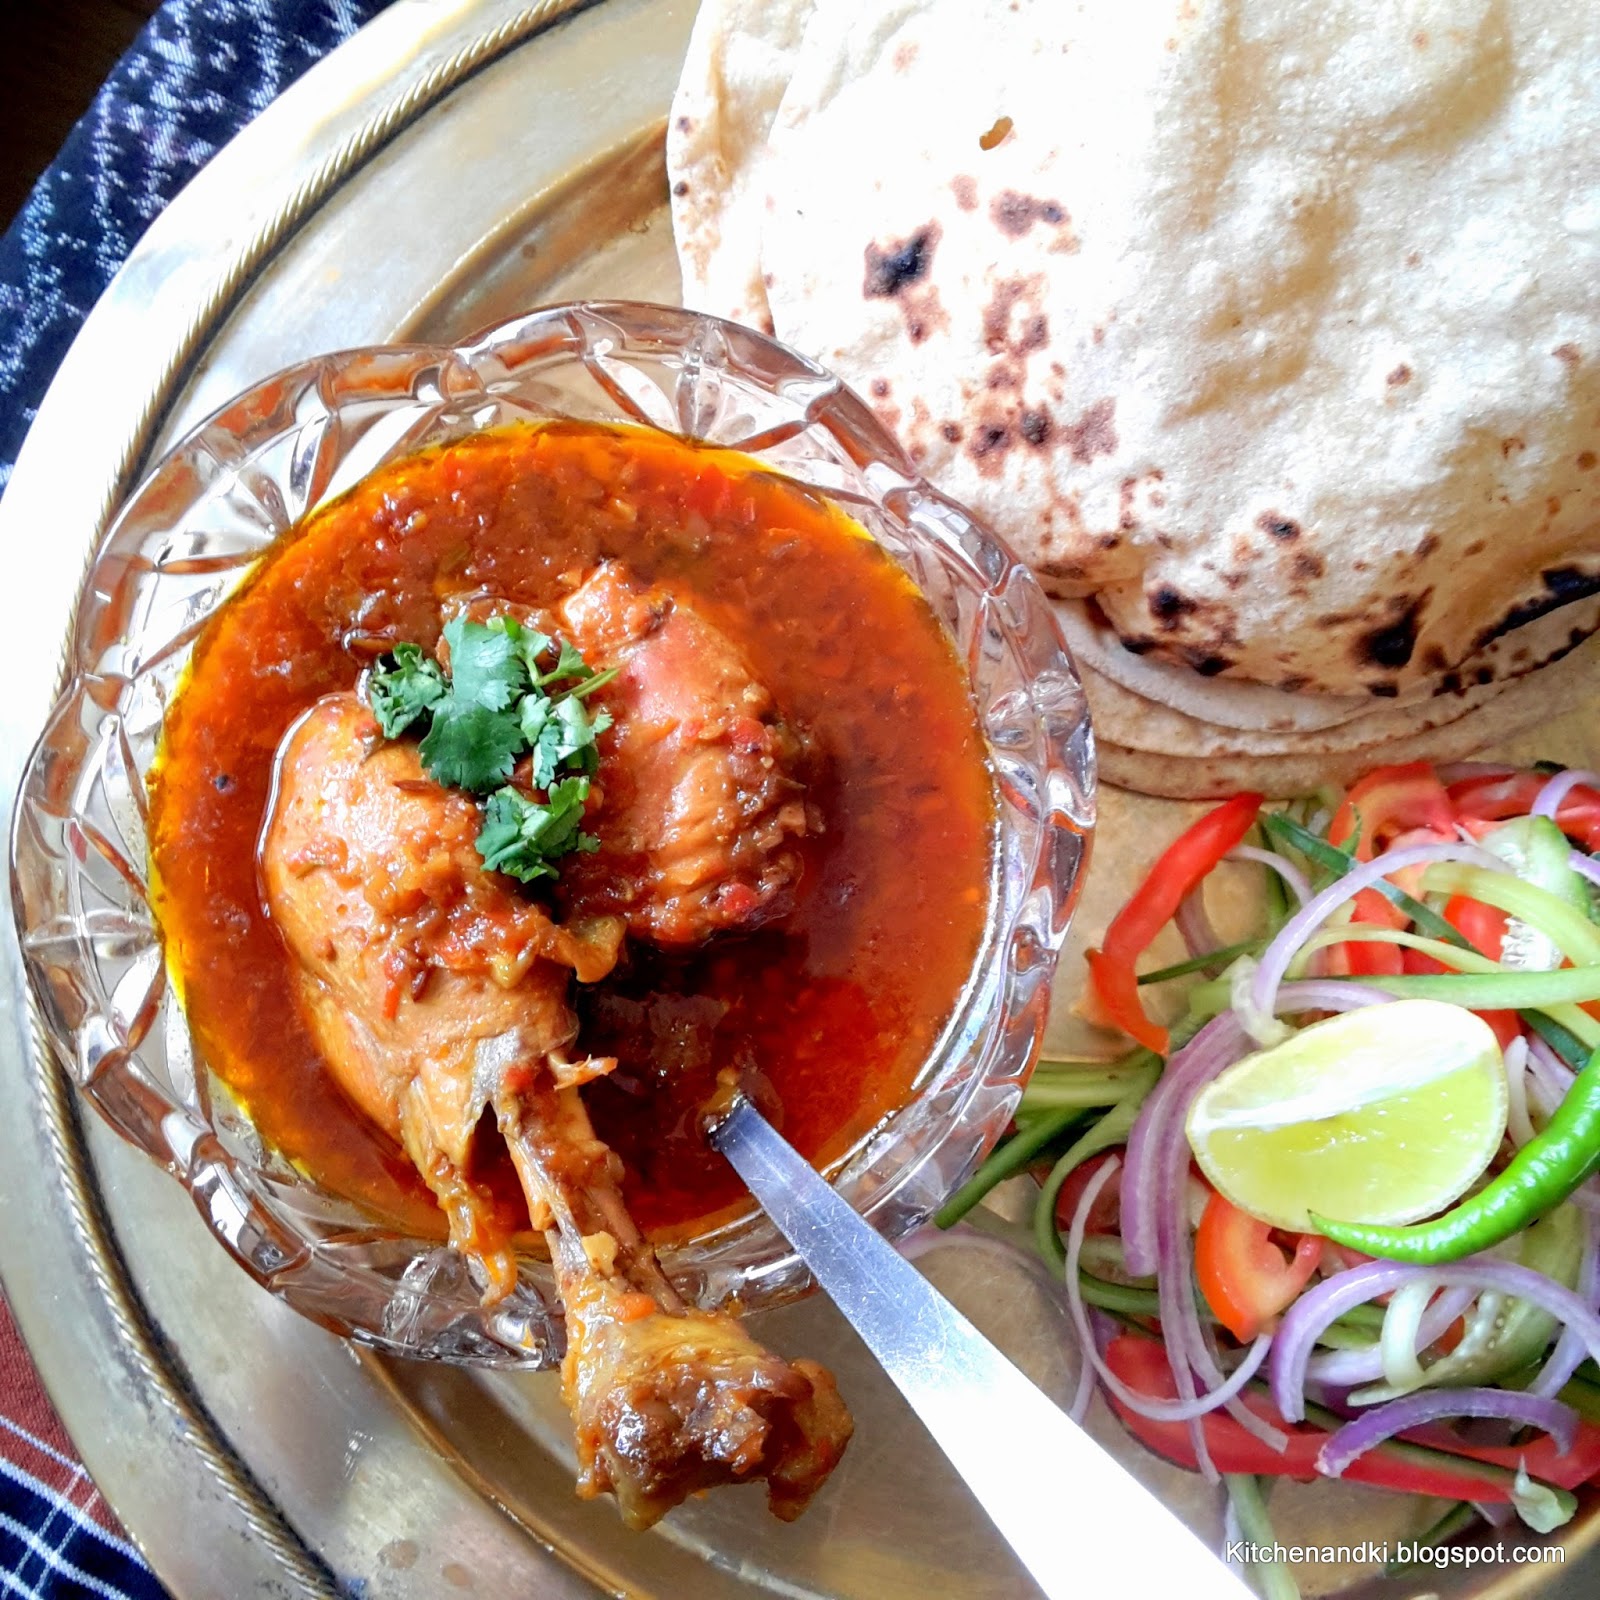
Garnish with fresh coriander leaves and serve.

I served my bowl of Tarriwala chicken with piping hot phulkas/ rotis and some salad of cucumbers, onions and tomatoes.
Homecooking in its purest form, with all the love, plateful of memories and a whole lot of flavour

Indulge!


thanx for sharing this CHICKEN TARRIWALA/ HOMESTYLE CHICKEN GRAVY recipe, my family is crazy for CHICKEN , this is so easy n looks delicious
ReplyDeleteCake Delivery in Ghaziabad
Cake Delivery in Faridabad
Cake Delivery in Dehradun